Changing the Size, Colors & CSS Classes
Recorder Size
The space occupied by the recorder client differs between the desktop recorder and mobile native recorder because the technology used is different, and the UI is different.
The size of the desktop recorder can be changed directly from the embed code or, when generating new embed codes, from our embed panel as shown below.
Changing When Generating New Embed Codes
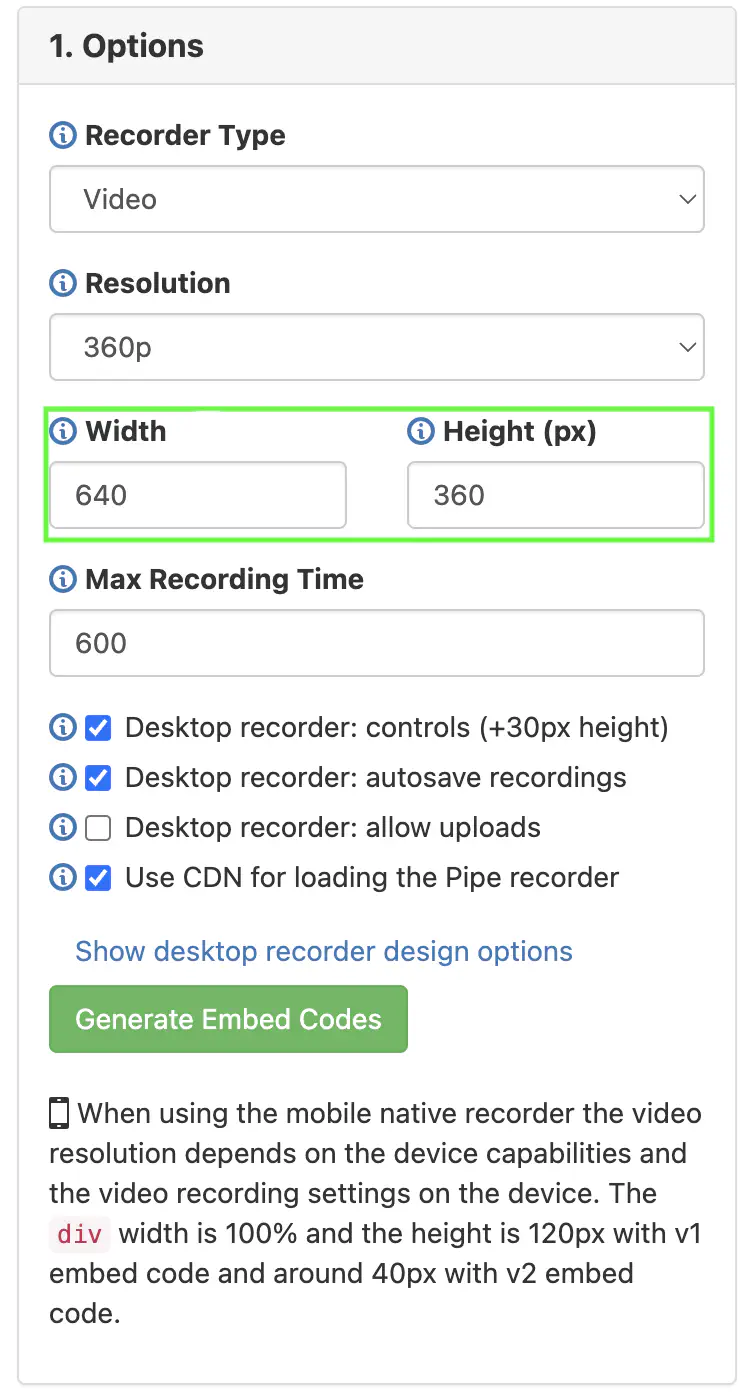
In your Pipe account dashboard, under the “Embed Recorder” tab, you will find the following panel with the width and height options:

Use the 2 inputs to specify the width and height of the black video area inside the recorder.
The width value you specify can also contain the CSS unit of length. You can use any valid CSS unit. If no unit is provided, our JS code will assume the value is in px . Valid values: 360, 360px, 50%, 100vm . In case an invalid CSS unit is specified for the width, we’ll just use the numeric part and pixels as the CSS unit.
The height value you specify here does not include the bottom control menu which will add 30px to the height. If you set a 320x240 size for the video area and keep the bottom menu you’ll end up with a 320x270 recorder.
In case an unsupported size unit is specified for the width, the value will default to pixels.
After you enter your desired size, press the “Generate Embed Code” button to update the preview and the size values in the embed code to the right of the page.
The size of the recorder won’t affect the resolution & quality of the videos recorded.
Changing Directly in the Embed Code
If you have a recorder already embedded in your web pages or if you’re in the code editor and want to make a quick change, you can easily change the size of the desktop recorder.
Embed Code v2.0 via HTML
In the 2.0 HTML embed code the size of the recorder is specified through the pipe-width and pipe-height attributes:
<piperecorder id="custom-id" pipe-width="400" pipe-height="330" ... >
The height value includes the 30px bottom menu so if you want a 400x300 video area in your desktop recorder ( to avoid black bars when recording at 400x300 or 4:3 video ) use 400 for the pipe-width and 330 for the pipe-height attributes.
For the width value, the measurement unit can also be specified, for example pipe-width can be 80%, 50vw, 250px, and so on. If no unit is specified for pipe-width, pixels will be used as the default unit.
Here is an example where the width unit is 80%:
<piperecorder id="custom-id" pipe-width="80%" pipe-height="330" ... >
Embed Code v2.0 via JavaScript
In the 2.0 JS embed code the size of the recorder is specified through the width and height properties of the size object:
var pipeParams = {size:{width:320,height:270}, qualityurl: "avq/360p.xml", accountHash:"ACCOUNT_HASH",...};
The height value includes the 30px bottom menu so if you want a 320x240 video area in your desktop recorder ( to avoid black bars when recording 320x240 or 4:3 video ) use 320x270 in the size object.
The width value is, by default, a number (width:320) but can be specified as a string to include the CSS unit (width:"80%"). If it is added as a number or string without a measurement unit, the value will be assumed to be in px.
Here is an example where the width unit is %:
var pipeParams = {size:{width:"80%",height:270}, qualityurl: "avq/360p.xml", accountHash:"ACCOUNT_HASH",...};
Embed Code v1.0
In the 1.0 embed code, the size of the recorder is specified through the size object. You’ll see this line in every 1.0 Pipe embed code:
var size = {width:400,height:330};
The height value includes the 30px bottom menu so if you want a 320x240 video area in your desktop recorder ( to avoid black bars when recording 320x240 or 4:3 video ) use 320x270 in the size object.
Colors and Rounded Corners
Pipe’s desktop recorder can be customized in terms of size (see above), colors, and square/rounded corners. These styling options are available regardless of the embed code used (1.0 or 2.0).
You can change the colors of the desktop recorder to better fit your webpage or app design.
These can be changed from the Pipe account dashboard for new recorders/embed codes or from the embed code directly.
Changing from the Pipe account dashboard for new embed codes
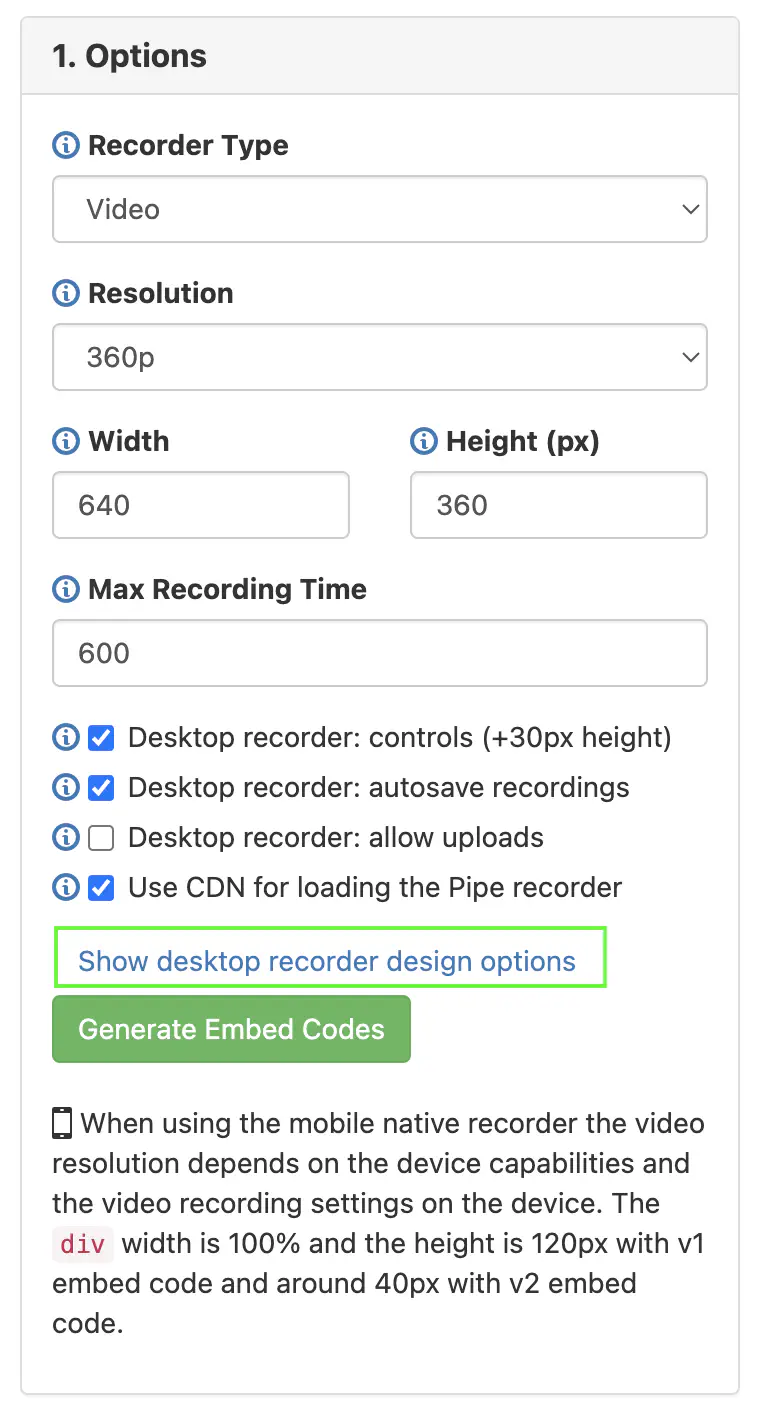
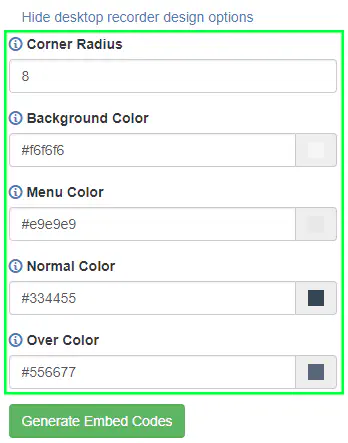
To change the colors from the Pipe account dashboard, you will have to open the design options panel:

From here you will be able to change from top to bottom:
- the radius of the 4 corners of the recorder
- the background color showed in the initial screen
- the bottom menu background color
- the normal and muse over colors for the text buttons in the initial screen

Once you’re done, press the “Generate Embed Code” button to see the changes and get the new embed code that includes these changes.
Changing in existing embed codes
For existing embed codes that you have in your web page or app, you can edit the code directly. Here’s what you have to do depending on your embed code version and type:
Embed Code v2.0 via HTML
Change the value of the pipe-cornerradius, pipe-bgcol, pipe-menucol, pipe-normalcol, and pipe-overcol attributes of the piperecorder tag.
<piperecorder id="custom-id" pipe-width="400" pipe-height="300" pipe-qualityurl="avq/360p.xml" pipe-accounthash="ACCOUNT_HASH" pipe-eid="ENVIRONMENT_ID" pipe-mrt="120" pipe-avrec="1" pipe-cornerradius="40" pipe-bgcol="0xff0000" pipe-menucol="0xff00e3" pipe-normalcol="0x00ff77" pipe-overcol="0xffda00" ></piperecorder>
Embed Code v2.0 via JavaScript
Change the value of the cornerradius, bgCol, menuCol, normalCol, and overCol properties of your JavaScript config object in your embed code.
var pipeParams = {size:{width:400,height:300},qualityurl:"avq/360p.xml",accountHash:"ACCOUNT_HASH",eid:"ENVIRONMENT_ID",mrt:120,avrec:1,cornerradius:40,bgCol:"0xff0000",menuCol:"0xff00e3",normalCol:"0x00ff77",overCol:"0xffda00"};
Embed Code v1.0
Change the value of the cornerradius, bgCol, menuCol, normalCol, and overCol properties of the flashvars object in your embed code.
var flashvars = {qualityurl:"avq/360p.xml",accountHash:"ACCOUNT_HASH",eid:"ENVIRONMENT_ID",mrt:120,avrec:1,cornerradius:40,bgCol:"0xff0000",menuCol:"0xff00e3",normalCol:"0x00ff77",overCol:"0xffda00"};
CSS Classes in the v2.0 Embed Code
Our newer 2.0 embed code uses this CSS file to control the look and feel of the desktop recorder and mobile native recorder.
We use classes instead of ids to target HTML UI elements because the 2.0 embed code allows for multiple recorders on the same page. All the recorders on a page will have these CSS classes applied to them.
These are the most important CSS classes:
| Name | Description |
|---|---|
pipeRecordRTC | is the main container for the elements in the initial screen |
pipeStartUploading | is a utility class that hides the default UI for the HTML file upload. We recommend not overriding this class |
pipeCustomUpload | controls the look of the Upload Video / Upload Audio button together with the class pipe-upload-label |
pipeUploadAnother | controls the look of the elements on the [Recorder or upload another one] screen |
pipeBtn | controls how the menu buttons (Record, Play, Pause, Save) look when enabled in the recording screen |
pipeBtnOff | controls how the menu buttons (Record, Play, Pause, Save) look when disabled in the recording screen |
pipeTimer | controls the look of the Pipe timer when recording and in the playback screen |
pipeMicContainer pipeMicIconNoMenu pipeMeter-container pipeMeter | these classes control the look and functionality of the microphone icon and microphone sound level displayed in the bottom right corner in the recording screen |
pipeNormal | applies to the video container on the recording screen |
pipeMirrored | used to mirror the video screen, we recommend not overriding this class |
pipeSmallNormal | controls how the small picture-in-picture video looks when playing back a video recording. We recommend not overriding this class |
pipeSmallMirrored | controls how the small picture-in-picture video looks when playing back a video recording, but it also mirrors it. We recommend not overriding this class |
pipeMsgOverlay | controls the look of the messages that are overlayed on the video |
pipeError | controls the look of the error screen |
How to Override the CSS Classes
To override the classes you can simply add !important to your own implementation of the CSS class, for example, let’s take the following Pipe CSS class:
.pipeRecordRTC span{
    position:absolute;
    margin: 0;
    left:50%;
    top:50%;
    margin-right: -50%;
    transform: translate(-50%, -50%);
    font-family:sans-serif;
    font-size:18px;
    cursor: pointer;
}
Let’s say you wish to make the text in the initial recording screen on the desktop recorder a little bit smaller, just 15px. To do this you simply re-declare the CSS class in your custom CSS file that you already probably have and just add the font-size:15px !important; property:
.pipeRecordRTC span{
    font-size:15px !important;
}
That’s it. Now the text in the initial recording screen on the desktop recorder will have a smaller font size.