Screen + Camera Recording
The Pipe Desktop Recording Client can record the screen, a camera and the microphone on recent versions of Chrome, Firefox, Edge and SafariBeta. Recording the system or browser tab sounds is also possible with Chrome and Edge.
Intro
Depending on the browser used, the user will be able to record the following:
- On Chrome and Edge one can record a camera + the microphone + the entire screen, an application window, or a Chrome/Edge tab + the system/tab sounds.
- On Firefox one can record a camera + the microphone + the entire screen or an application window.
- On SafariBeta one can record a camera + the microphone + the entire screen or an application window.
On Chrome 74+ and Edge 79+ you can record the screen together with the system or tab sounds.
Recording the camera or system sounds together with the screen/window/tab is only possible when using the 2.0 embed code.
Because of the large files it creates, the screen recording feature is only available during the trial and for accounts with the PRO subscription.
The feature is not enabled by default but you can easily enable it for your embedded recording clients (see below).
How to Enable Screen Recording
From the UI
You can easily enable the screen recording option in your Desktop Recording Client when generating a new embed code from the Embed section of your Account Dashboard:
- Sign in to your Pipe Account Dashboard at https://dashboard.addpipe.com
- Go to the Embed Recorder page
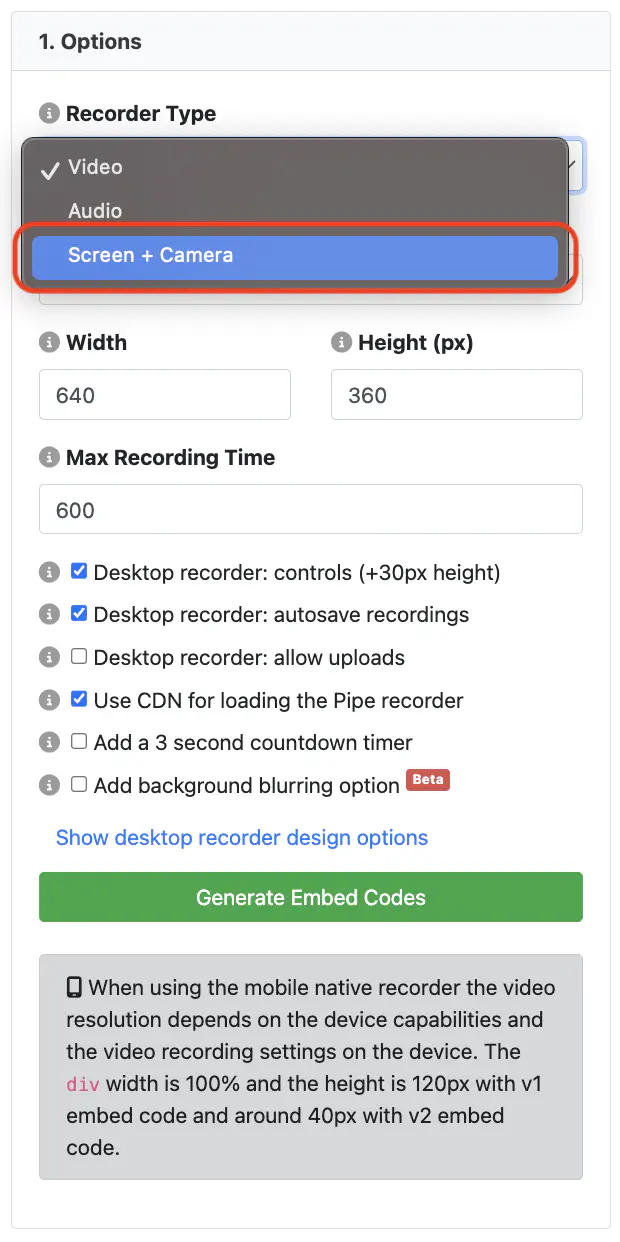
- On the left side, in the Options panel, select Screen + Camera in the Recorder Type drop-down
- Click the green Generate Embed Codes button
- Copy and paste the newly generated code into your website
From Code
Embed Code v2.0 via HTML
Add the pipe-srec="1" attribute to the piperecorder tag
Embed Code v2.0 via JavaScript
Add the srec property to your custom JavaScript object and give it a value of 1: srec:1 Your custom object will be passed as a parameter to PipeSDK.insert().
Embed Code v1.0
Add the srec property to the flashvars object and set it to 1 like so:

Recording the Screen
When screen recording is enabled, the Desktop Recording Client will show a [Record Screen] button on the initial screen.
In the example below, screen recording, recording from the webcam and uploading existing files are all enabled:
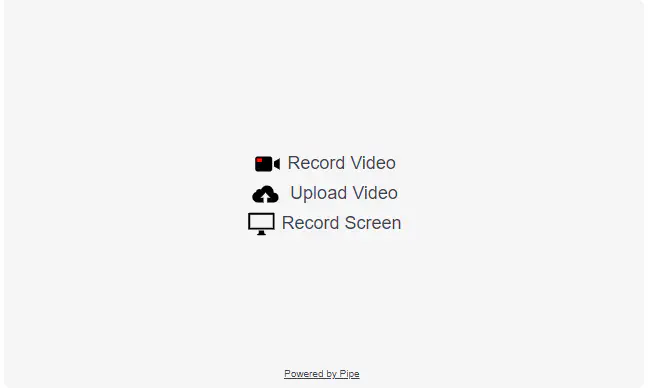
Once [Record Screen] is clicked the user will 1st be prompted to allow microphone access. The user must allow microphone access to continue to screen recording.
After microphone access is granted, the user will be presented with a new button labeled “Select screen for capture”. Clicking it will bring up the browser based dialogue for choosing the screen, window or tab to share. Chrome and Edge will also offer the option to share the system/tab audio at this time. The user will be prompted to choose the surface to share every time. The option cannot be persisted for reuse. This is a security feature implemented in the browsers.
Recording the Screen and Camera
With the 2.0 Desktop Recording Client the end user can record both the camera and the screen at the same time.
To start recording both the camera and the screen, the user can click on the “Record Camera” rectangle positioned in the bottom-right corner of the recording client or toggle the “Record Camera” option from the camera device selector menu. Both methods are illustrated in the following images below:
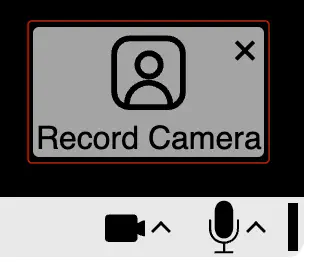
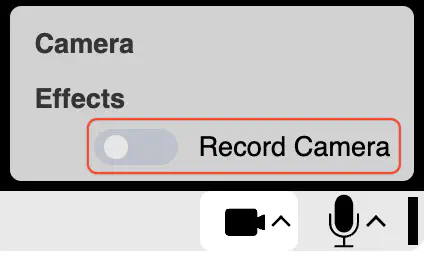
The camera feed can be resized and moved around while actively recording and the user can enable video effects (background blurring or solid color background) for the camera feed.
Video Effects
Video effects can also be added to the camera feed. These include:
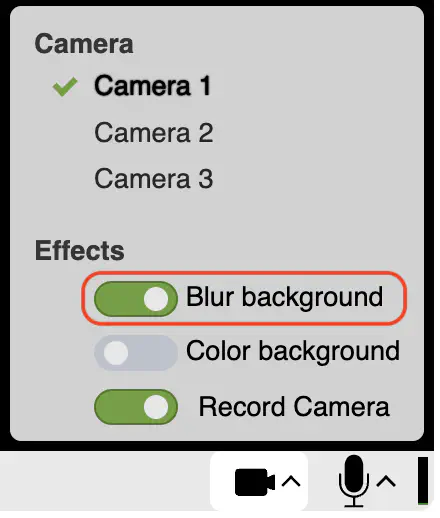
Background Blurring
Enabling this feature applies a real-time background blurring effect to the camera feed. It’s important to note that this effect must be activated through the embed code options first. Learn how to enable the Background Blurring effect.
Solid Color Background
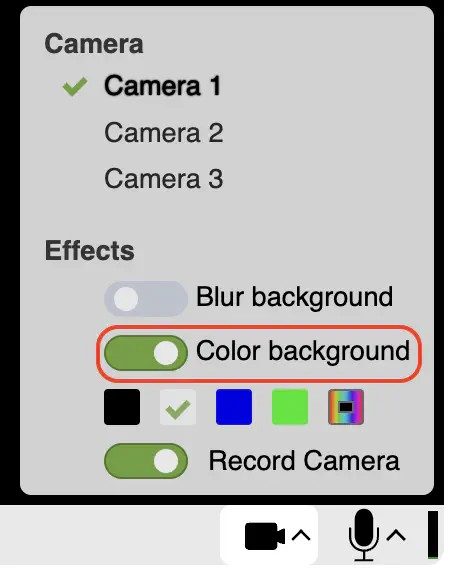
Enabling this effect will introduce a solid color background to the camera feed. You can choose from a preset selection of four colors or opt for a custom color using the color picker tool.
Known Issues
- On Chrome recording a tab will throw the error Device error: no audio or video data if no activity is registered in the captured tab (no mouse movements, no scrolling etc).
- On Firefox recording certain application windows, i.e. a Chrome window, will result in black-screen videos. The audio will be recorded as expected.
- On SafariBeta recording small application windows will result in the window only being shown in the top left corner of the recording, while the remaining area of the recording will be black.
- On All Browsers if you have a powered MacBook with the lid closed and connected to an external monitor, the integrated “FaceTime HD Camera” input device might be available as an option for the Camera feed, but will not display any video if selected.