Screen Recording
Intro
Our recording client supports screen recording on modern deskop browsers. Together with the screen, it can also capture the microphone and overlay the camera stream. Recording the system or browser tab sounds is also possible with some browsers.
Requirements
Screen recording is supported on all major desktop browsers.
We always test against recent versions of Chrome, Firefox, and Safari, but the feature should also work on any Chromium-based browsers like Microsoft Edge or Brave.
Screen recording is not supported on mobile browsers. The necessary API has not yet been implemented in mobile browsers.
Because of the large files it creates, the screen recording feature is only available during the trial and for accounts with the PRO subscription. You can sign up for a free 14 days trial account here.
Feature Support
Some features are only supported by some browsers and operating systems. Here’s a recent comparison:
| Browser | screen | window | tab | UI |
|---|---|---|---|---|
| Chrome on macOS | ✓ (including system audio) | ✓ (including system audio) | ✓ (including tab audio) | big modal |
| Firefox on macOS | ✓ | multiple windows | uses the new macOS window/screen picker | |
| Safari on macOS | ✓ | multiple windows | uses the new macOS window/screen picker | |
| Chrome on Windows | ✓ (including system audio) | ✓ | ✓ (including tab audio) | big modal |
| Firefox on Windows | ✓ | ✓ | simple drop down |
On Chrome (and Chromium based browsers) you can record the screen together with the system or tab sounds. The system sounds can be captured only on Windows and ChromeOS when sharing your entire screen. For the system/tab sound to be mixed with the microphone input you need to be using the now standard 2.0 embed code to embed the recording client in your web site or web app.
On Safari and Firefox on macOS, you can now share multiple windows using the macOS built-in private window picker.
The screen recording feature can be easily enabled for your embedded recording clients (see below).
How to Create a Screen Recording Capable Recorder
From the Dashboard
Follow these steps to create a screen recording capable recording widget and embed it into your website:
- Sign in to your Pipe Account Dashboard at https://dashboard.addpipe.com
- Go to the Embed Recorder page
- On the left side, in the Options panel, select Screen + Camera in the Recorder Type drop-down
- Click the green Generate Embed Codes button
- Copy and paste the newly generated code into your website

From Code
If you have an existing embed code, follow these instructions to enable the screen recording feature:
Embed Code v2.0 via HTML
Add the pipe-srec="1" attribute to the piperecorder tag.
Embed Code v2.0 via JavaScript
Add the srec property to your custom JavaScript object and give it a value of 1: srec:1 Your custom object will be passed as a parameter to PipeSDK.insert().
Embed Code v1.0
Add the srec property to the flashvars object and set it to 1 like so:

Changing the Shared Screen Source
After initializing the recording client and selecting a screen, window, or tab to share, you can later change the shared source without reloading the page or restarting the recording client. This is useful if the originally selected source becomes unavailable (for example, you close the shared window/tab or the browser revokes permissions).
A button is available in the bottom menu of the recording client that allows you to switch to a new source while not actively recording. Clicking this button will prompt the browser’s built-in screen selection dialog again, giving you the option to pick a different screen, window, or tab.

Once a new source is chosen, the old stream is replaced with the new one. If you cancel the dialog, the existing source remains active.
This functionality ensures that even if permissions are revoked or the original screen is closed, you can always select another source and continue recording without interruption.
Recording the Screen, Microphone
When screen recording is enabled, the Pipe Recording Client will show a [Record Screen] button on the initial screen.
In the example below, screen recording, recording from the webcam and uploading existing files are all enabled:

Once [Record Screen] is clicked, a prompt will appear to select a screen, window, or tab for capture. In Chrome, Edge, and other Chromium-based browsers (such as Brave), an additional option may be presented to include system or tab audio.
If screen access is denied, the error message “Permission was denied. Could not get screen stream” will be shown. This selection must be made each time recording is started, as browsers do not allow the choice to be remembered for security reasons.
After a screen has been selected, a prompt will appear requesting microphone access. If permission is granted, both screen and microphone audio will be recorded. If permission is denied, recording will still continue, but without microphone audio.
Recording the Screen, Microphone and System Sounds
On Windows, with Edge, Chrome, or other Chromium-based browsers like Brave, it is possible to capture the system sounds when the user shares/captures their entire screen.
On macOS, using Chrome, it is also possible to capture system audio when sharing the entire screen or a window.
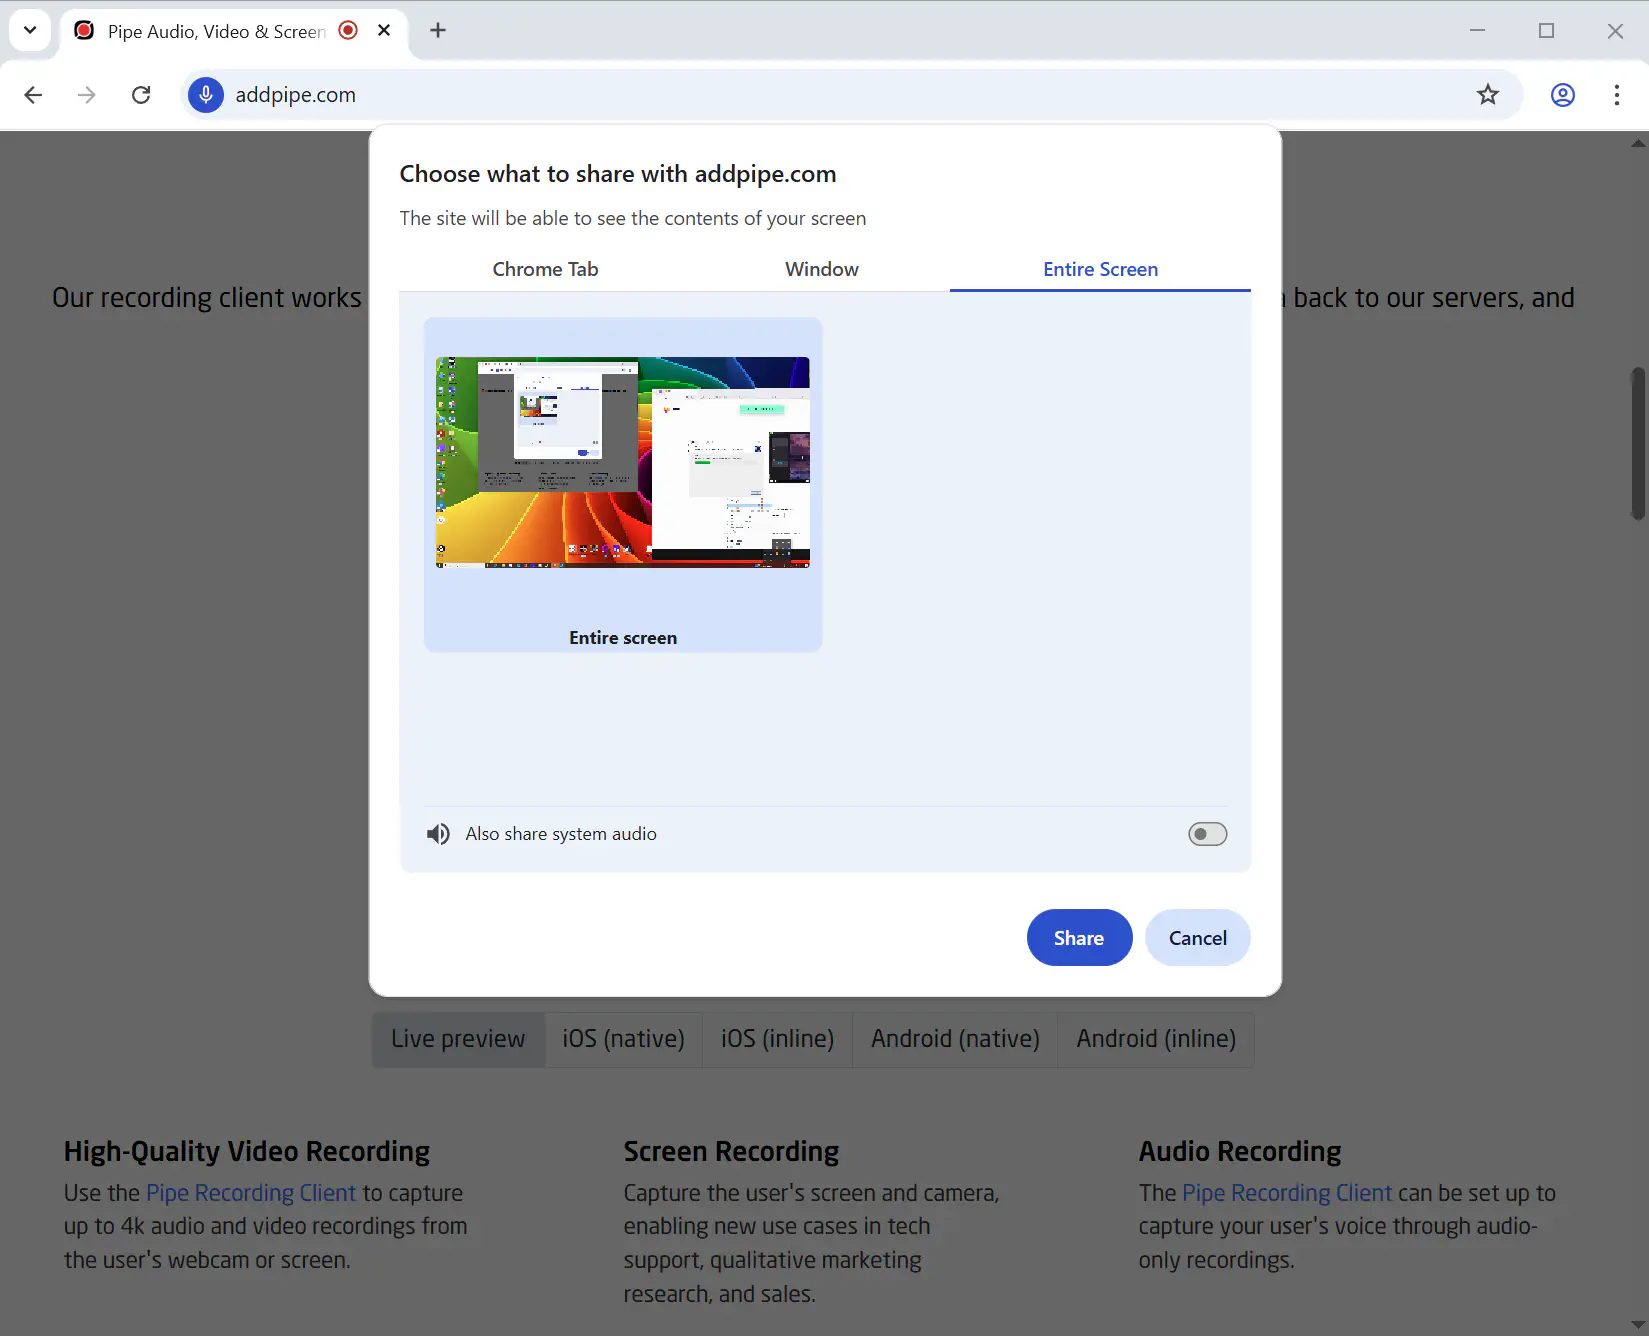
The Pipe Recording Client, will grab the system audio from the screen sharing stream, mix it with the microphone input and produce a screen recording with one audio track containing both the microphone and system sounds.
Recording the Screen, Camera and Microphone
A recent update made it possible to record the screen and camera at the same time.
The screen recording + facecam feature is currently in BETA.
To start recording both the camera and the screen, the user can click on the “Add Camera” rectangle positioned in the bottom-right corner of the Pipe recording client or toggle the “Add Camera” option from the camera device selector menu. Both methods are illustrated in the following images below:


The camera overlay can be resized and moved around while actively recording and the user can enable video effects (background blurring or solid color background).
The initial webcam stream resolution will respect the video resolution settings provided in your embed code. However, when drawn over the screen stream, the webcam stream is initially scaled down to 16% of the shared surface’s width (window, screen, browser tab), while ensuring a minimum width of 100 pixels. Users can freely resize and reposition the webcam overlay at any time.
Camera Video Effects
Video effects can also be added to the camera feed. Please note that the feature is CPU-intensive and may result in slower performance. These effects include:
Background Blurring
Enabling this feature applies a real-time background blurring effect to the camera feed. It’s important to note that this effect must be activated through the embed code options first. Learn how to enable the Background Blurring effect.

Solid Color Background
Enabling this effect will introduce a solid color background to the camera feed. You can choose from a preset selection of four colors or opt for a custom color using the color picker tool.

Custom Constraints
Recently we introduced the ability to specify custom getDisplayMedia() constraints. This gives you more control over how screen sharing behaves in browsers that support these constraints. For example, you can:
- Control the frame rate of the screen recording: using the
frameRatevideo constraint. By default, browsers will capture screen recordings at 30fps. You can change this by passing aframeRatevalue through thepipe-gdmconstraintsembed code option. This also affects screen recordings with webcam; - Prevent the user from sharing his or her entire screen using the
monitorTypeSurfacesconstraint; - Force the user to share the current tab: usign the
preferCurrentTabconstraint; - Disable the ability to share system audio: using the
systemAudioconstraint;
For a full list of constraints, check out the MDN documentation. Some of these are also covered in depth in Privacy-preserving screen sharing controls and our own Screen Sharing a Single Tab With getViewportMedia or getDisplayMedia.
To play around with these constraints check out our getDisplayMedia demo.
Resolutions
The actual resolution of your screen recording will vary depending on what you’re capturing (the entire screen, a window, or a browser tab), and on high-DPI (Retina) displays, it may also depend on your display settings. Below are some common scenarios and how resolutions behave in these scenarios.
Codec Behavior at High Resolutions
Chrome switches to VP8 for high resolution screen recordings (for example, when recording a 4K screen).
Recording Fullscreen on High-DPI (Retina) Displays
macOS
On macOS, when capturing the entire screen:
- with Chrome and Firefox, the recording resolution is double the resolution configured in the system settings, but no more than the displays maximum resolution.
- with Safari, the recording resolution matches the scaled resolution shown in System Settings.
For example, if your 14-inch MacBook PRO’s Display resolution is set to “Default” (1512x982), and you record the entire screen, Chrome and Firefox will produce a 3024x1964 video while Safari will produce a 1512x982 video.
Windows
On Windows, the screen recording resolution matches the screen’s native pixel resolution, regardless of the browser.
Capturing a Window That Changes Size Mid-Recording
When capturing a specific window, and that window is resized during the recording session:
- The recording will maintain the initial resolution, based on the windows’ size at the moment recording starts.
- If the window is later resized (made smaller or larger), the content will be scaled (stretched or compressed) to fit the initial resolution.
- This can result in visible distortion or blurriness in the recorded video when the aspect ratio or dimensions change during capture.
Adding Windows to a Shared Canvas on macOS
When recording on macOS and additional windows are shared using the new system-level screen sharing user interface:
- The recording will maintain the initial resolution, based on the window’s size at the moment the recording starts.
- Any new windows added to the shared view will be displayed within the same fixed canvas size.
- A black background will fill the remaining space as needed, and all visible windows will appear within that canvas, without resizing the overall video resolution.
Screen Recording on macOS
It is possible to record your screen on macOS using just a modern browser like Safari, Chrome or Firefox and the Pipe Recording Client.
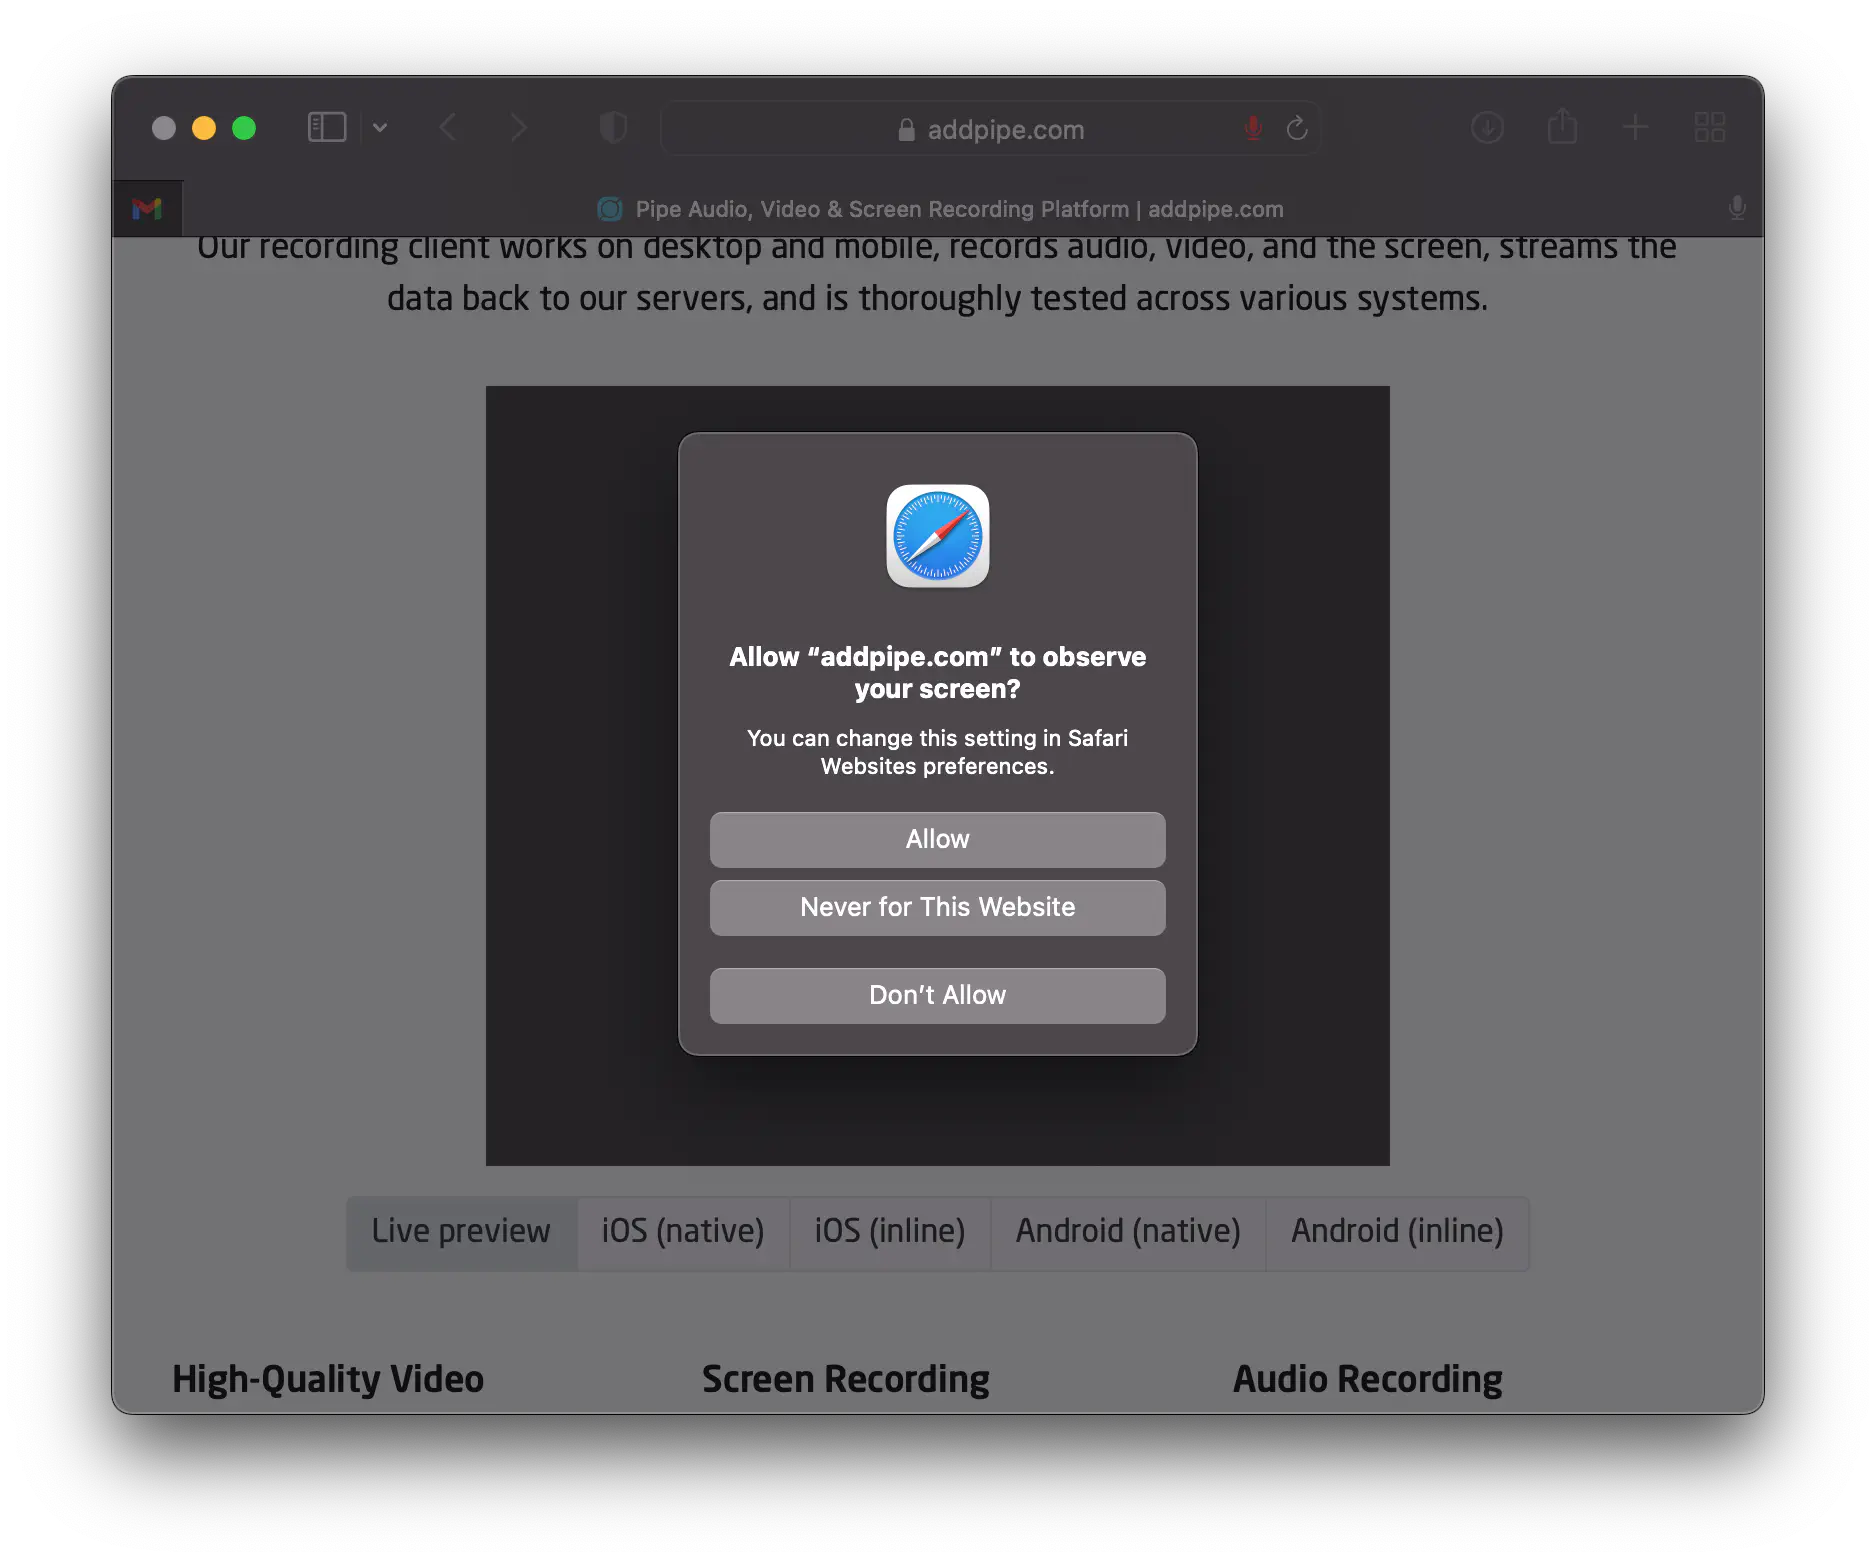
Up to macOS Monterey 12 browsers were only able to record the entire screen. Safari prompted you to Allow it to “observe your screen”.
Starting with macOS Ventura 13, Apple has introduced a new, OS-level, screen sharing UI. It changed how macOS handles screen capture requests from browsers, putting you in control and reducing the chance of screen sharing stuff you didn’t mean to. But it was only available in Safari and FaceTime.
With this new UI, instead of an app getting permission to record everything on your screen, you can now choose to share only a specific window or multiple windows directly from the OS-level screen sharing UI, or Screen Sharing Picker as Apple calls it.

In macOS Sonoma 14 the new screen capture API and UI (ScreenCaptureKit and SCContentSharingPicker) became available to other apps. Firefox eventually switched to it starting with Firefox 132.
In macOS Sequoia 15 the old screen capture APIs were deprecated and a new warning message started being shown for apps that don’t use the new screen sharing APIs and UI.
Requesting To Bypass the System Private Window Picker
Starting with macOS Sequoia 15, if an app is trying to record your screen without using the new privacy focused API/UI, the user will be prompted by the warning: [APP] is requesting to bypass the system private window picker.

This happens because Apple deprecated older screen sharing API in macOS Sequoia 15.
So when using the Pipe Recording Client to record the screen from browsers other than Safari or Firefox 132+, you will be prompted by this warning, which is normal and expected.
macOS Screen Recording Permissions
Across macOS versions, browsers and apps other than Safari and FaceTime will have to get an OS level permission to record the screen. Here’s how the prompt looks:
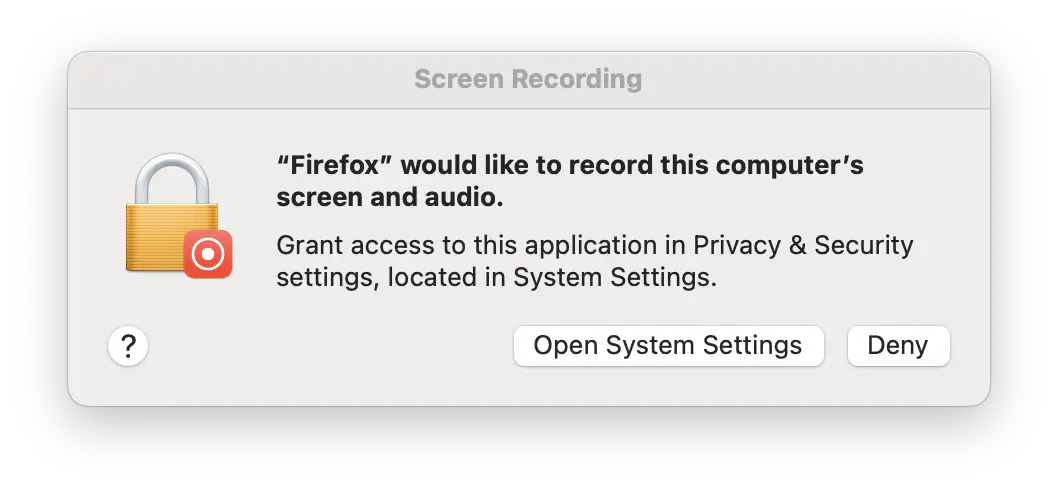
After granting permission, the user will have to restart the browser. The user only has to do this once per browser/app.
On macOS Sequoia and Sonoma you will find the list of apps which have been granted permission under System Settings > Privacy & Security > Screen & System Audio Recording .

Screen Recording in Chrome
Chrome and Chromium-based browsers like Microsoft Edge are the best browsers to use when it comes to browser-powered screen sharing. Here’s why:
- It’s the only browser that allows you to share a browser tab (and it does it without OS level permissions). Other browsers will only allow you to share an application window, or the entire screen;
- Chrome presents a live thumbnail preview of each available surface, making it easier to choose what you want to share;
- Chrome allows you to share the tab audio and the system audio;
- Chrome makes it very clear you’re currently sharing a surface (tab, window or screen);
- Chrome also ships with a set of privacy preserving controls for screen sharing.
macOS Permissions
On macOS, recording a browser tab in Chrome does not require macOS-level permissions. Sharing an application window or the entire screen will require screen recording permissions under System Settings > Privacy & Security > Screen & System Audio Recording.
Sharing Tab and System Audio
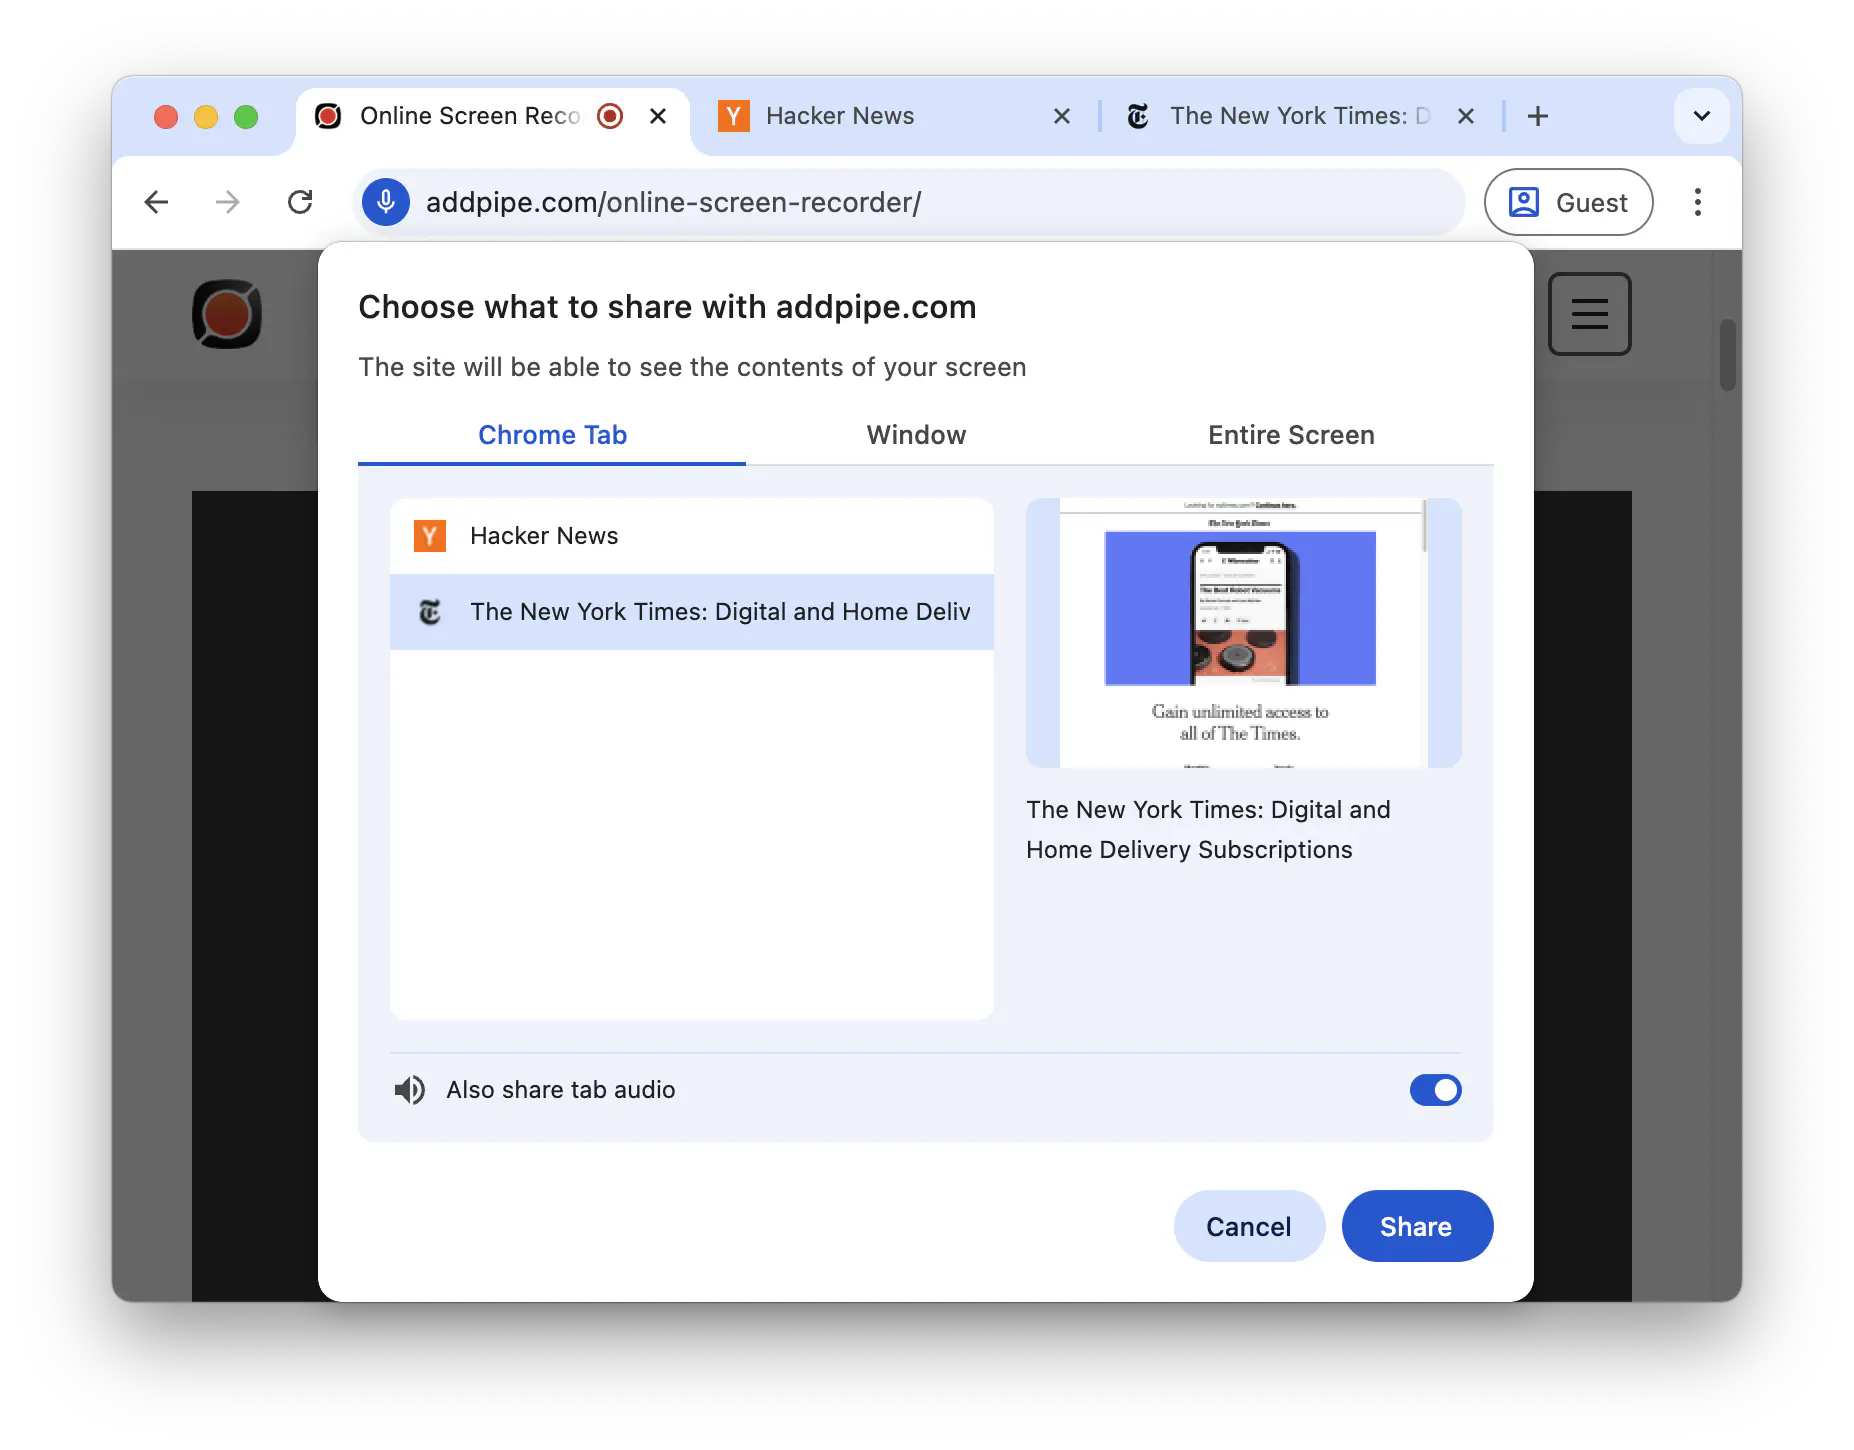
Capturing system and tab audio makes sense when recording your screen for webinars, lessons, tech support, qualitative research, etc.. It does not make sense when the captured audio video is broadcasted in an online call, back to the same people that generated the audio.
Chrome supports capturing tab audio. When sharing a browser tab, users have acess to a checkbox labeled “Also share tab audio”. It is enabled by default.
![]()
On Chrome (and Chromium based browsers) you can record the screen together with the system or tab sounds.
Screen Sharing Indicators
When a Chrome tab is being shared, there’s a screen sharing ribbon shown on all tabs, which allows you to switch to the shared tab, share the current tab instead, or stop sharing altogether. Also, a distinct screen recording icon appears on shared tab menu item, which acts as a visual indicator to the user (which tab is currently shared).
![]()
When a window or the entire scren are being shared, Chrome will show a small OS level overlay.
Other Privacy Preserving Features
With Chrome, you can set up a screen recorder that pre-selects the display surface and/or excludes the “Entire Screen” options. Chrome also excludes the current tab from the list of tabs offered to the user to prevent the “hall of mirrors” effect and allows one to easily switch the shared tab. All of these controls are now available in the recording client through the embed code option pipe-gdmconstraints. You can read more about these controls in the Privacy-preserving screen sharing controls article.
Articles
We’ve written quite a bit on the topic:
- 2018 Standards Compliant Screen Capture in Chrome 70 (behind a flag)
- 2019 Standards Compliant Screen Capture in Chrome 72
- 2019 product update Screen Recording In Chrome and Firefox Without Extensions
- 2019 product update: Screen Recording With System Sounds In Chrome
- 2024 product update: Recording The Webcam And The Screen At The Same Time
- 2025 Screen Sharing Got Smarter (and More Private) on macOS: Understanding the System Private Window Picker